You can verify Override Address using the below SQL:
select fscpv.parameter_value from fnd_svc_comp_params_tl fscpt ,fnd_svc_comp_param_vals fscpv where fscpt.display_name = ‘Test Address’ and fscpt.parameter_id = fscpv.parameter_id;
Update Override Address using the below SQL:
update fnd_svc_comp_param_vals fscpv set fscpv.PARAMETER_VALUE = ‘admin@oracle-homes.com’ where fscpv.parameter_id in ( select fscpt.parameter_id from fnd_svc_comp_params_tl fscpt where fscpt.display_name = ‘Test Address’);
You can verify the same Override Address using the below SQL:
select fscpv.parameter_value from fnd_svc_comp_params_tl fscpt ,fnd_svc_comp_param_vals fscpv where fscpt.display_name = ‘Test Address’ and fscpt.parameter_id = fscpv.parameter_id;
The Oracle Cloud Infrastructure policy specifies who has access to which resources in OCI. Policies simply allow a group to manage certain types of resources in a specific compartment in certain ways.
Policy basic Syntax:
Allow group <group_name> | <group_ocid> to <verb> <resource-type> in compartment <compartment_name>

Allow group <group_name> | <group_ocid> to <verb> <resource-type> in tenancy
Verbs:
inspect: Resource listing without access to confidential information or user-specified metadata. read: It includes inspect as well as the ability to get user-specified metadata as well as the resource itself. use: Includes reading and working with existing resources. Includes updating the resource, except for resource types where “update” has the same effect as “create”. In general, this verb doesn’t include the ability to create or delete. manage: Includes all permissions associated with the resource.
Resource types:
all-resources: All Oracle Cloud Infrastructure resource-types compute-management-family: Compute database-family: Autonomous Database, Bare Metal and Virtual Machine DB Systems virtual-network-family: Networking
Here are few Policy examples that I have come across with my projects
Allow group TEST_GROUP to manage virtual-network-family in compartment TEST_COMPARTMENT

Allow group TEST_GROUP to read virtual-network-family in compartment TEST_COMPARTMENT

Allow group TEST_GROUP to use virtual-network-family in compartment TEST_COMPARTMENT

Allow group TEST_GROUP to manage object-family in compartment TEST_COMPARTMENT

Allow group TEST_GROUP to read metrics in compartment TEST_COMPARTMENT

Allow group TEST_GROUP to manage log-groups in compartment TEST_COMPARTMENT

Allow group TEST_GROUP to manage log in compartment TEST_COMPARTMENT

Allow group TEST_GROUP to read instance-family in compartment TEST_COMPARTMENT

Allow group TEST_GROUP to read virtual-network-family in compartment TEST_COMPARTMENT

Allow group TEST_GROUP to read object-family in compartment TEST_COMPARTMENT

Allow group TEST_GROUP to read all-resources in compartment TEST_COMPARTMENT

Allow group TEST_GROUP to use virtual-network-family in compartment TEST_COMPARTMENT

Allow group TEST_GROUP to manage virtual-network-family in compartment TEST_COMPARTMENT

Allow group TEST_GROUP to use volume-family in compartment TEST_COMPARTMENT

Allow group TEST_GROUP to manage volume-family in compartment TEST_COMPARTMENT

Allow group TEST_GROUP to manage instance-family in compartment TEST_COMPARTMENT

Allow group TEST_GROUP to manage cloud-shell in compartment TEST_COMPARTMENT

Allow group TEST_GROUP to manage mount-targets in compartment TEST_COMPARTMENT

Allow group TEST_GROUP to manage file-systems in compartment TEST_COMPARTMENT

Allow group TEST_GROUP to read file-systems in compartment TEST_COMPARTMENT

Allow group TEST_GROUP to manage mount-targets in compartment TEST_COMPARTMENT

Allow group TEST_GROUP to inspect file-systems in compartment TEST_COMPARTMENT

Allow group TEST_GROUP to manage load-balancers in compartment TEST_COMPARTMENT

Allow group TEST_GROUP to manage file-systems in compartment TEST_COMPARTMENT

Allow group TEST_GROUP to manage mount-targets in compartment TEST_COMPARTMENT

Allow group TEST_GROUP to manage export-sets in compartment TEST_COMPARTMENT

Allow group TEST_GROUP to manage cloud-shell in tenancy

Allow group TEST_GROUP to manage bastions in compartment TEST_COMPARTMENT

Allow group TEST_GROUP to manage groups in tenancy

Allow group TEST_GROUP to manage vaults in compartment TEST_COMPARTMENT

Allow group TEST_GROUP to manage keys in compartment TEST_COMPARTMENT

Allow group TEST_GROUP to manage alarms in tenancy

Allow group TEST_GROUP to manage metrics in tenancy

Allow group TEST_GROUP to manage bastion-family in compartment TEST_COMPARTMENT

Allow group TEST_GROUP to manage tag-namespaces in tenancy

Allow group TEST_GROUP to read users in tenancy

Allow group TEST_GROUP to inspect users in tenancy

Allow group TEST_GROUP to use users in tenancy

allow group TEST_GROUP to manage dynamic-groups in tenancy

Allow group TEST_GROUP to manage instance-family in compartment TEST_COMPARTMENT where request.resource.shape = 'VM.Standard.E2.1.Micro'

Allow group TEST_GROUP to read instance-family in compartment TEST_COMPARTMENT

Allow group TEST_GROUP to use virtual-network-family in compartment TEST_COMPARTMENT

allow group TEST_GROUP to manage bastions in compartment TEST_COMPARTMENT

Allow group Policy_Testing_group to manage users in compartment TEST_COMPARTMENT

Allow group Policy_Testing_group to manage groups in compartment TEST_COMPARTMENT

Allow group Policy_Testing_group to manage policies in compartment TEST_COMPARTMENT

allow group Policy_Testing_group to manage compartments in compartment TEST_COMPARTMENT

Allow group TEST_GROUP to manage groups in compartment TEST_COMPARTMENT

Allow group TEST_GROUP to manage policies in compartment TEST_COMPARTMENT

allow group TEST_GROUP to use cloud-shell in compartment TEST_COMPARTMENT

Allow group TEST_GROUP to manage autonomous-database-family in compartment TEST_COMPARTMENT

Allow group TEST_GROUP to manage db-systems in compartment TEST_COMPARTMENT
Let us see how to create the file storage service in the Oracle Cloud (OCI) and mount it via NFS to the Linux VM.
We can create a shareable file system using FSS to make it highly available.
File System Storage Service
Oracle Cloud Infrastructure File Storage Service provides a durable, scalable, distributed, enterprise-grade network file system. You can connect to a File Storage Service file system from any bare metal, virtual machine, or container instance in your Virtual Cloud Network (VCN). You can also access a file system from outside the VCN using Oracle Cloud Infrastructure FastConnect and Internet Protocol security (IPSec) virtual private network (VPN).
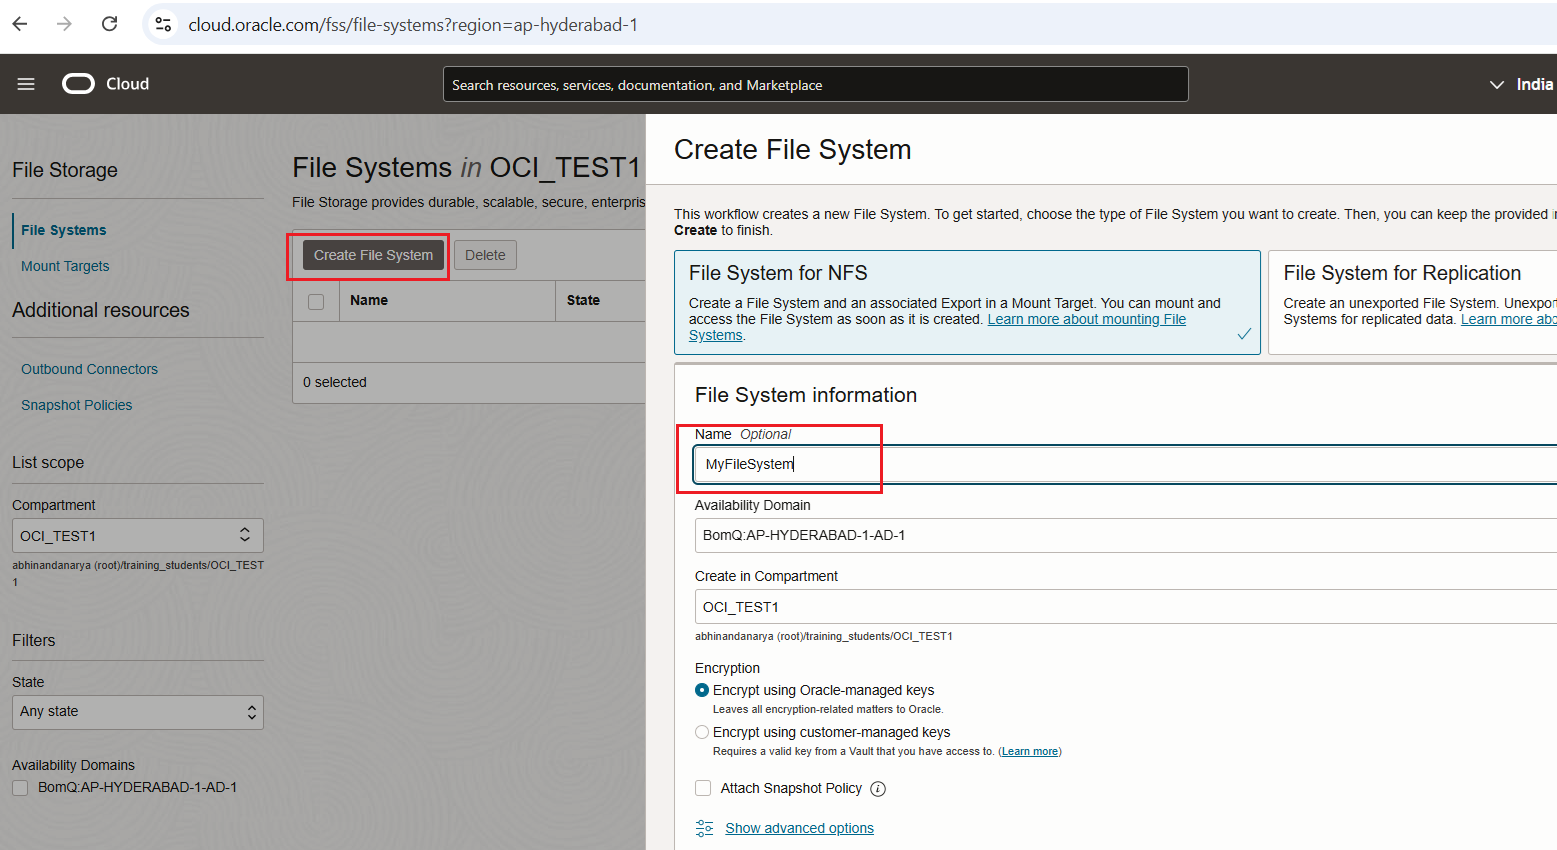
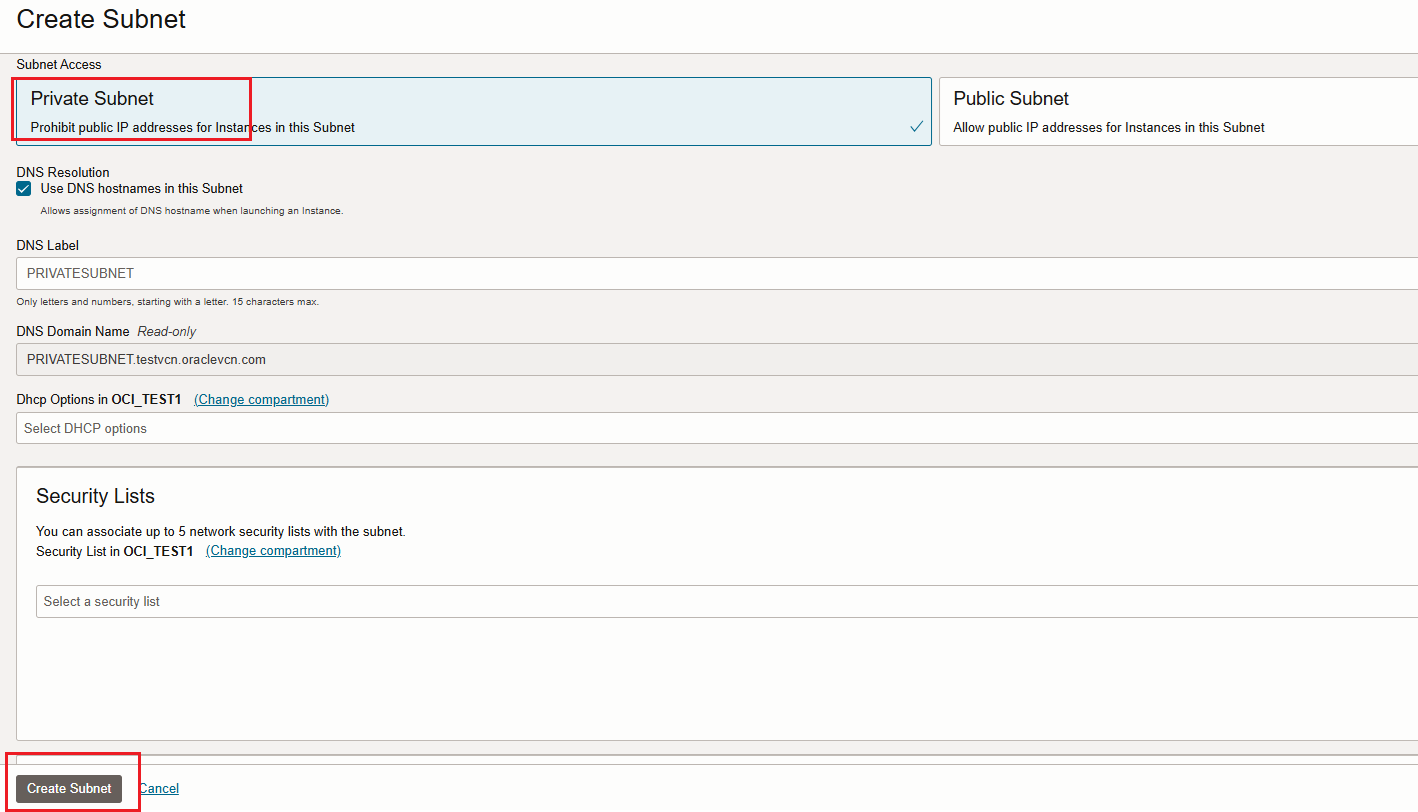
Create the file system service in the Oracle Cloud. Navigate to: Storage -> File Systems. Click “Create…”
Provide File System Name
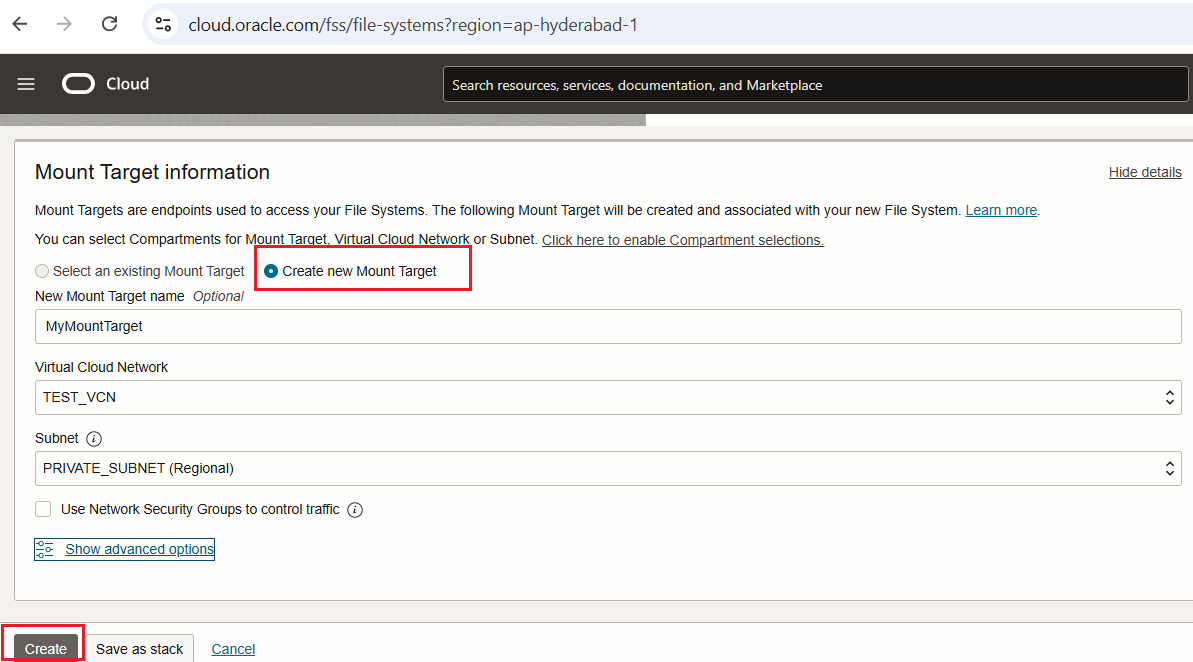
Create New Mount Target and provide Mount Target Name
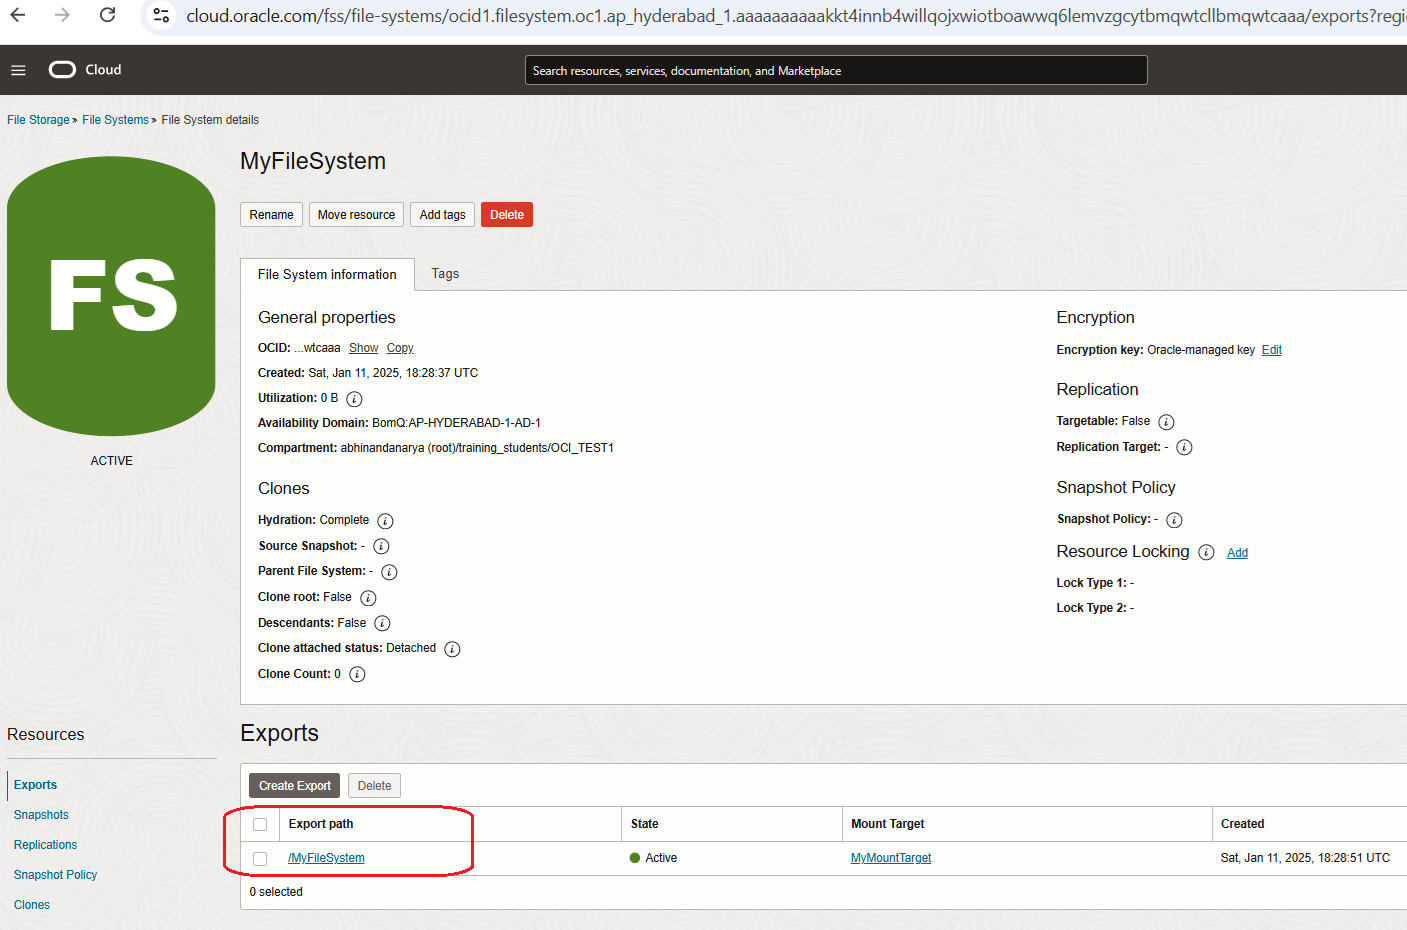
Now File System is created. Go to Export Path
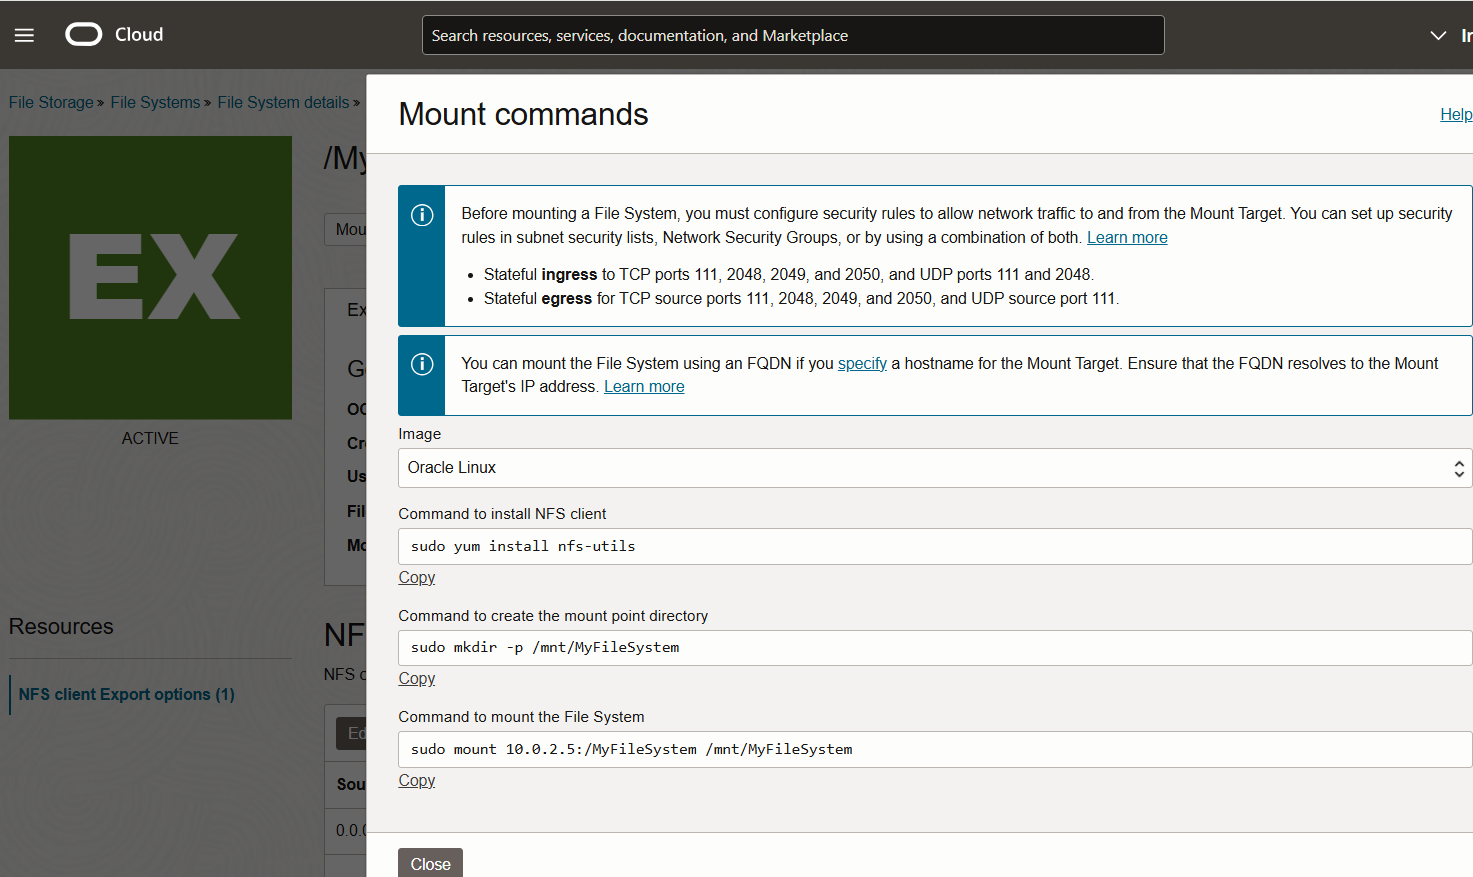
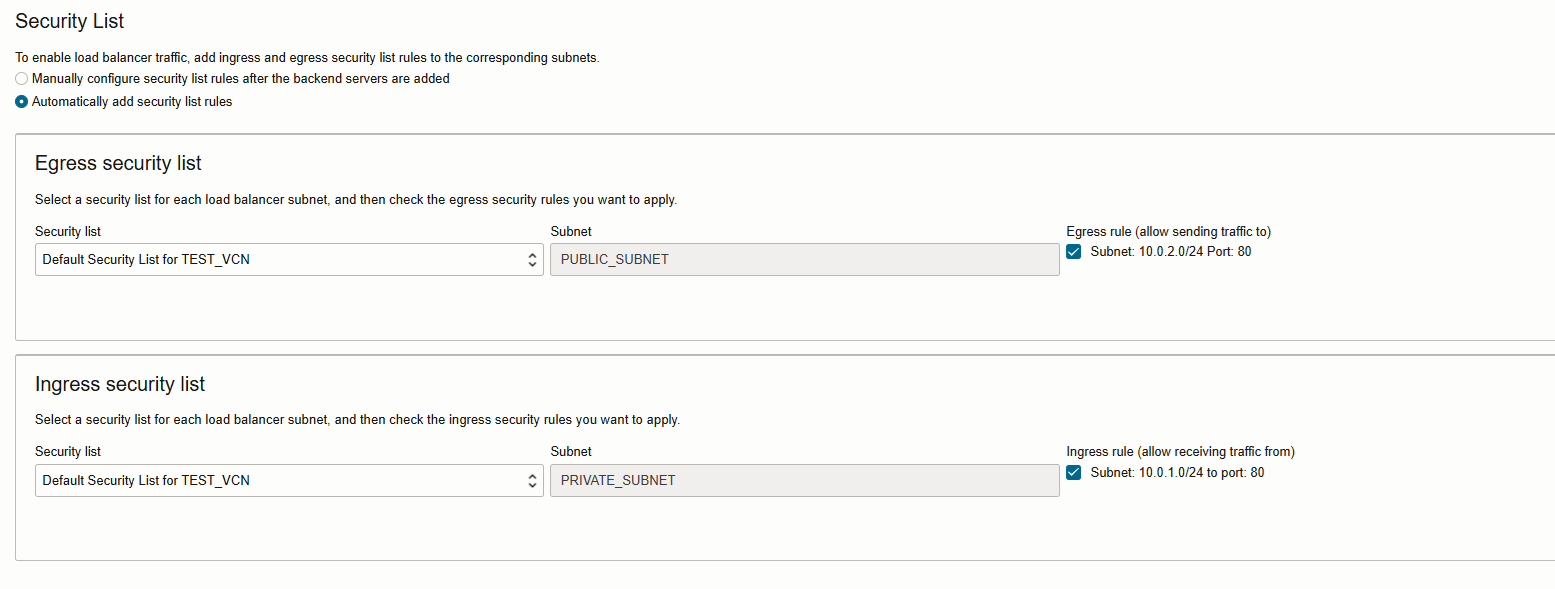
As per the Mount commands in Export Path, update the subnet security list ingress and egress rules
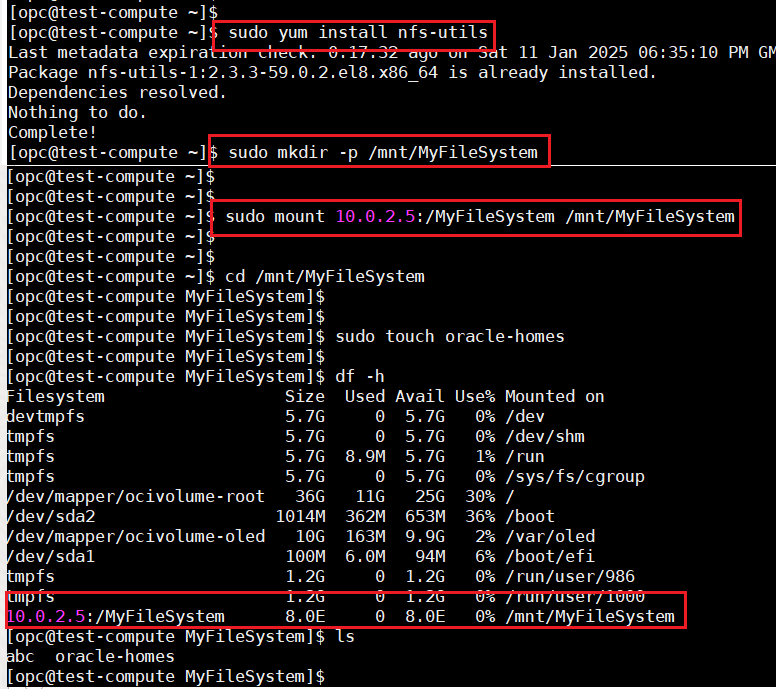
Install nfs utils and mount the file system
The file system has been mounted via NFS protocol and can now be used.
VCN Peering we need to have different CIDR Blocks without overlap, so I choose 10.254.0.0/16 and 172.16.0.0/16 from two different regions Hyd and Mumbai.
VCN -1
VCN – 2
REGION
HYDERABAD
MUMBAI
VCN NAME
HYD_REGION_VCN
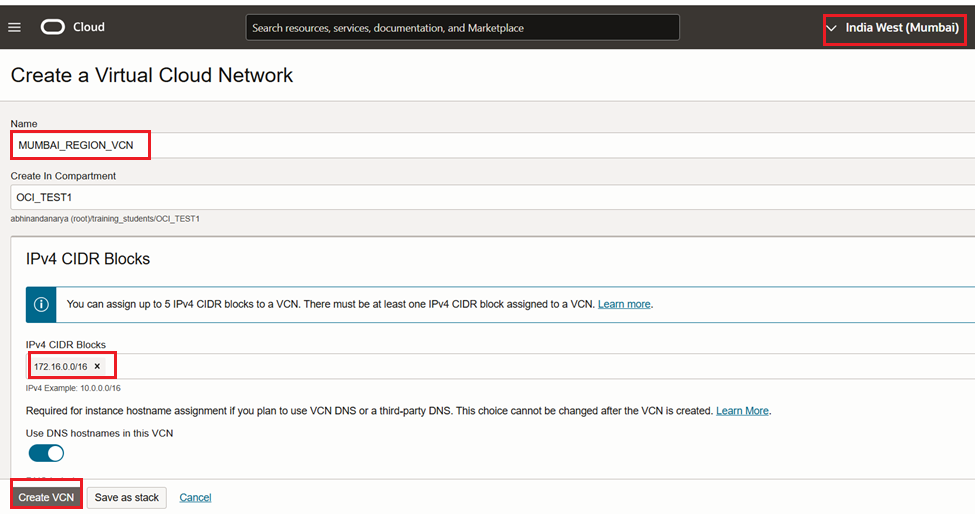
MUMBAI_REGION_VCN
VCN CIDR
10.254.0.0/16
172.16.0.0/16
DRG
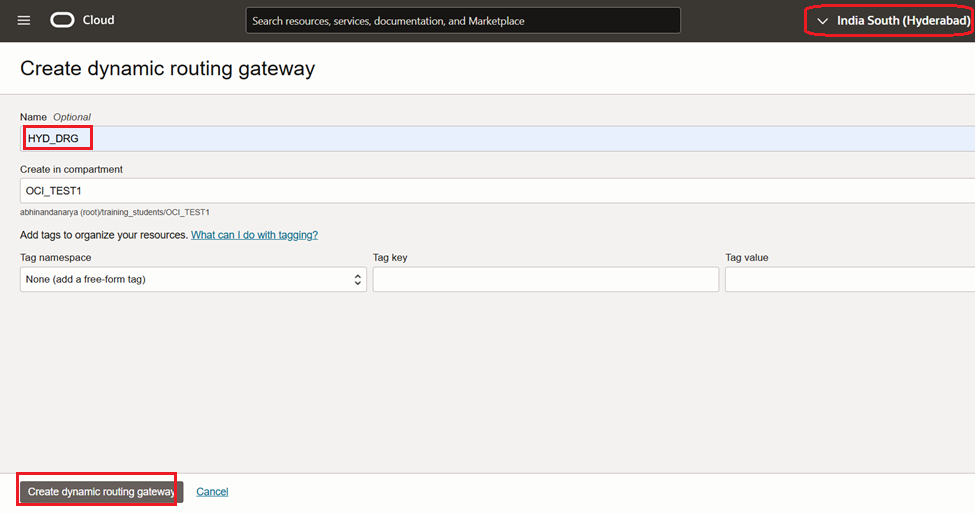
HYD_DRG
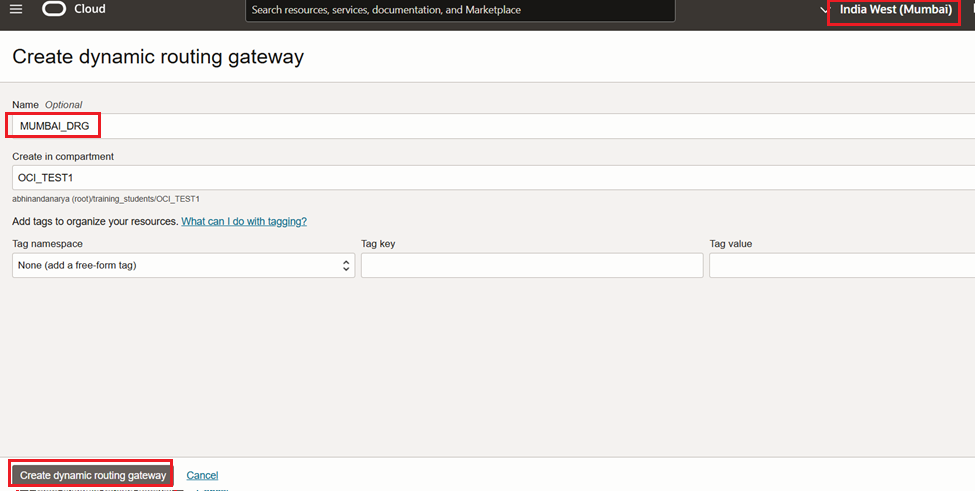
MUMBAI_DRG
RPC
HYD_RPC
MUM_RPC
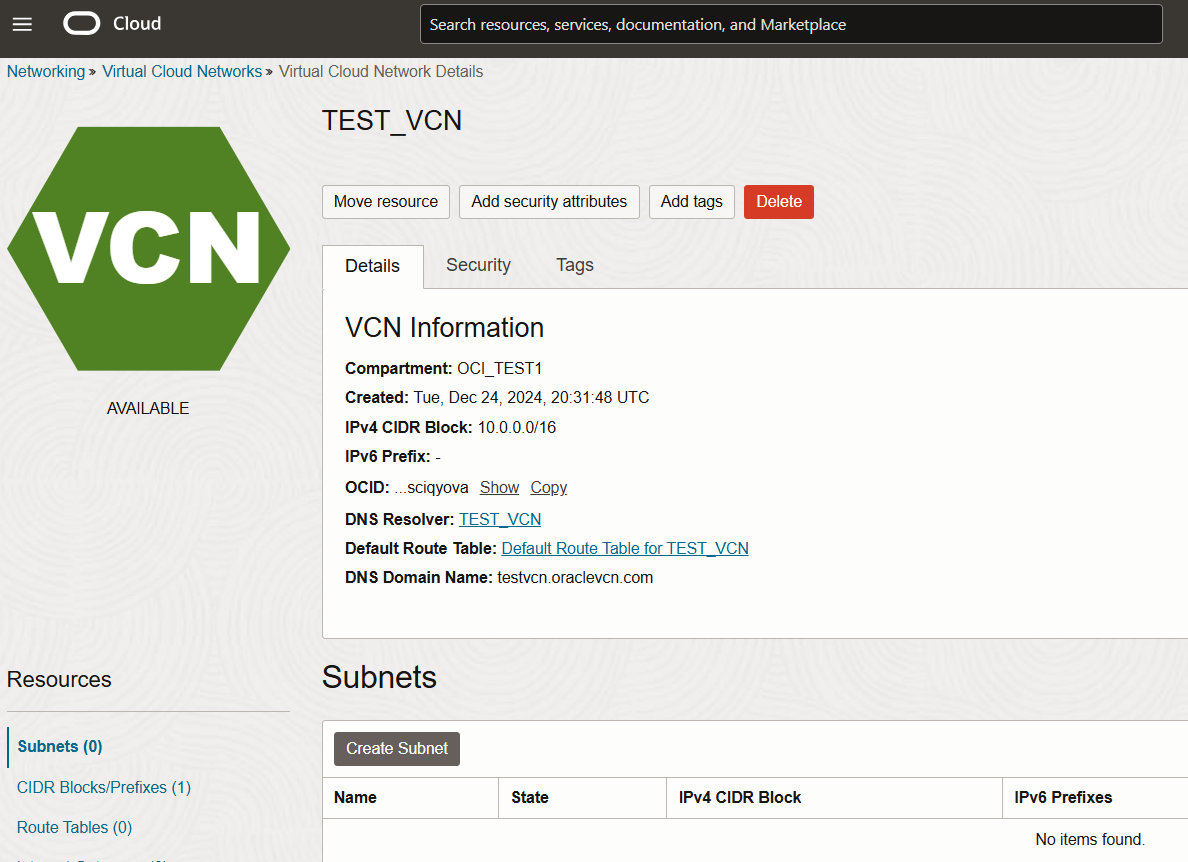
Create Two VCNs in Hyderabad and Mumbai Regions with CIDR 10.254.0.0/16 and 172.16.0.0/16
Create Two DRGs in Hyderabad and Mumbai Regions
Create VCN Attachment in both DRGs, pointing to respective VCN.
In HYD DRG
In MUM DRG
Create Remote Peering Connection in both DRG regions.
In HYD DRG, create RPC
In MUM DRG, create RPC
Peering status is in NEW state both the sides
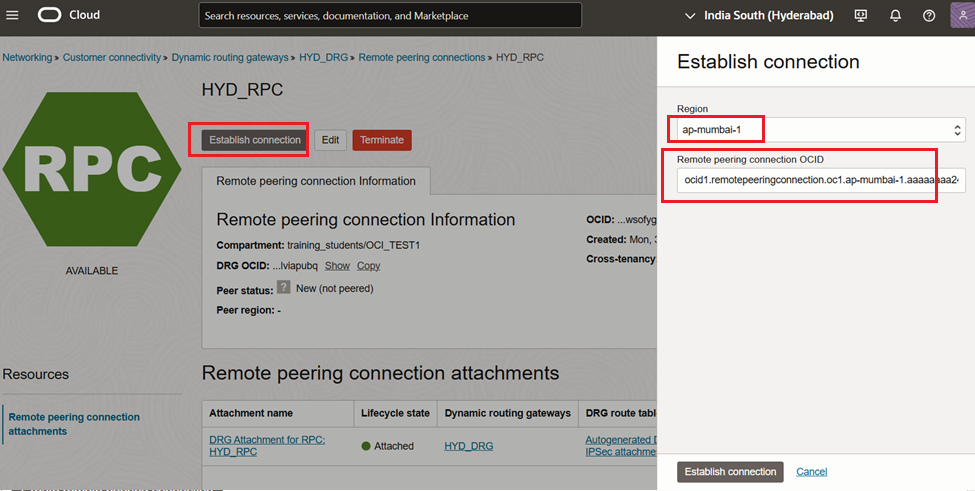
Now establish the peering between two VCNs
Go to any one of the RPC -> Click on Establish connection, provide Mumbai region and OCID of other RPC (Mumbai)
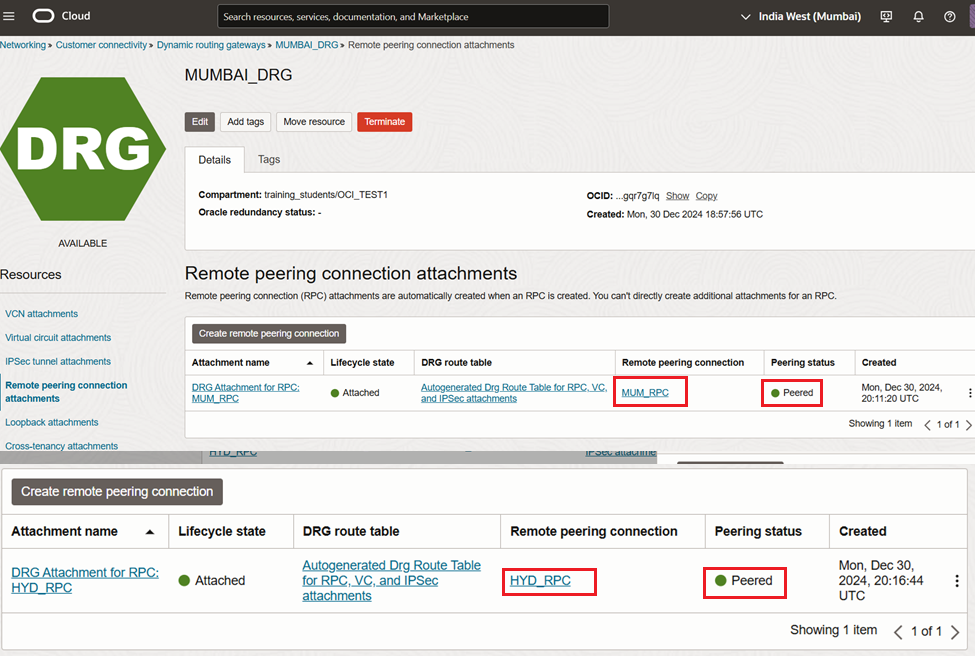
Check the Peering status from both the sides
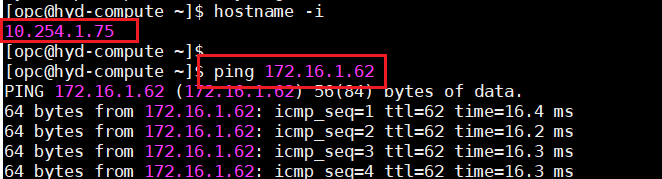
Update the Route Table and Security Rules and Verify the connectivity between VCNs
Established the communication from the CIDR 10.254.0.0/16 to 172.16.0.0/16
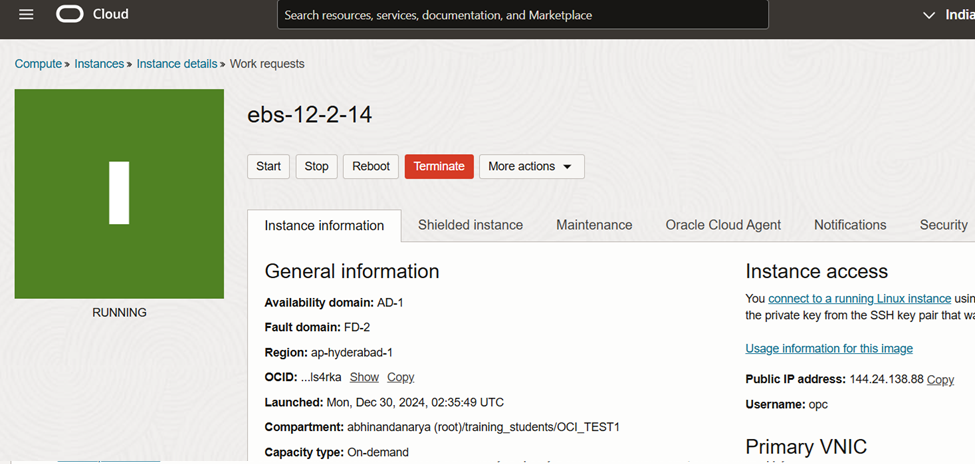
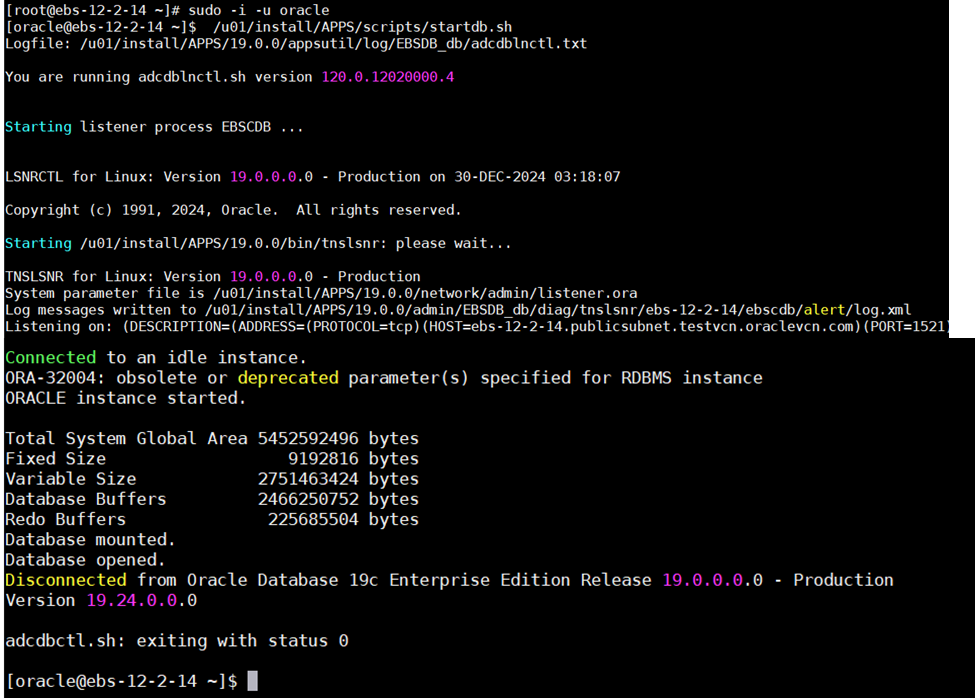
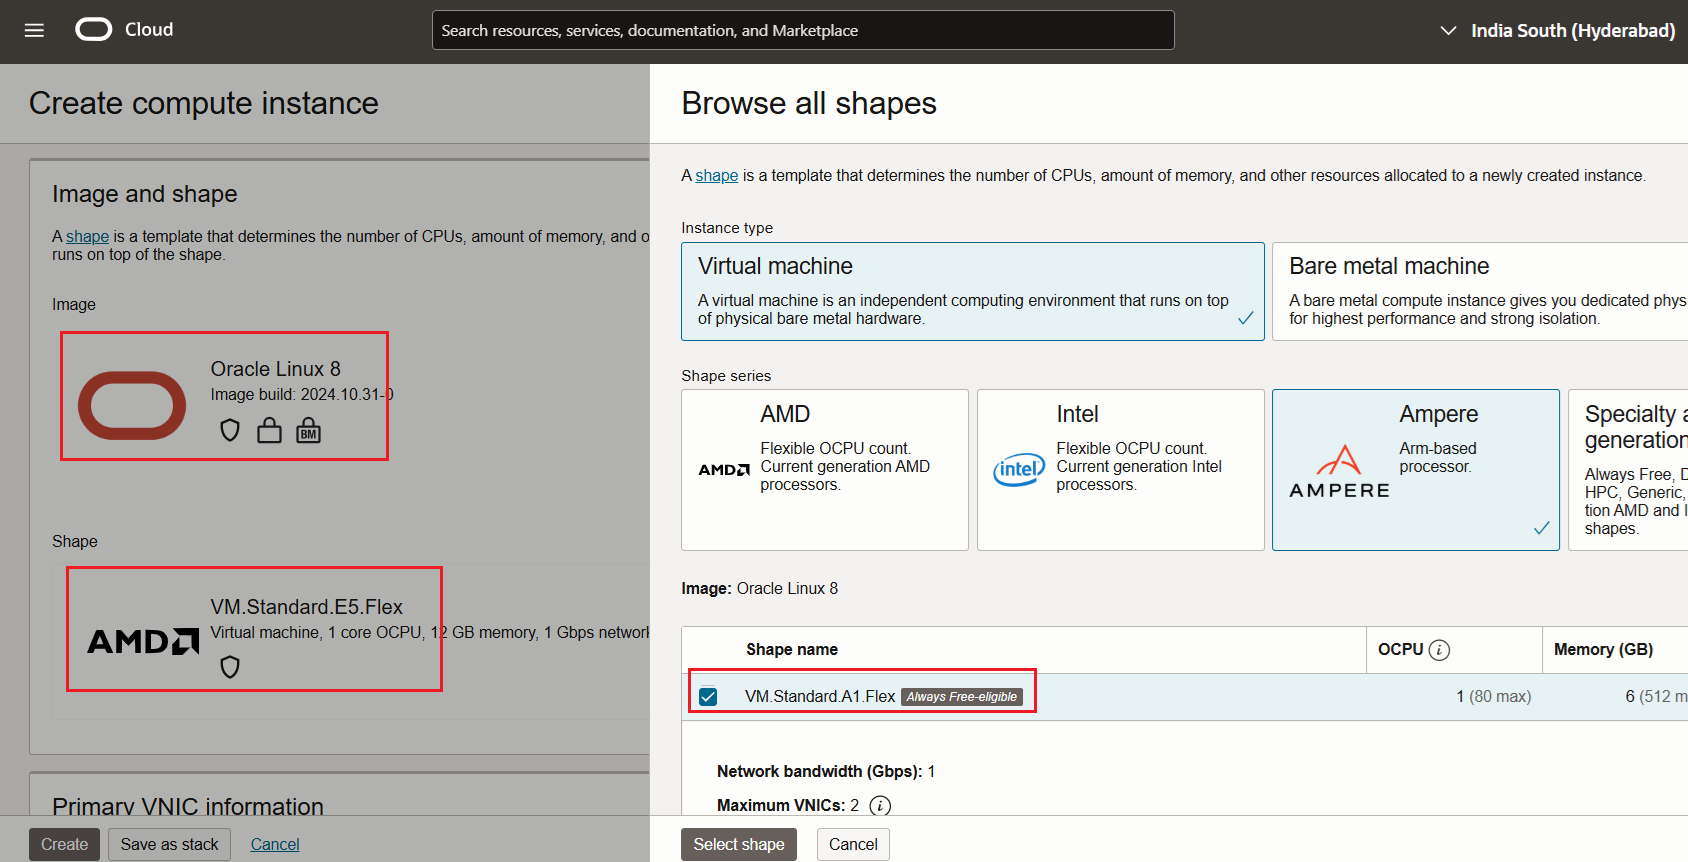
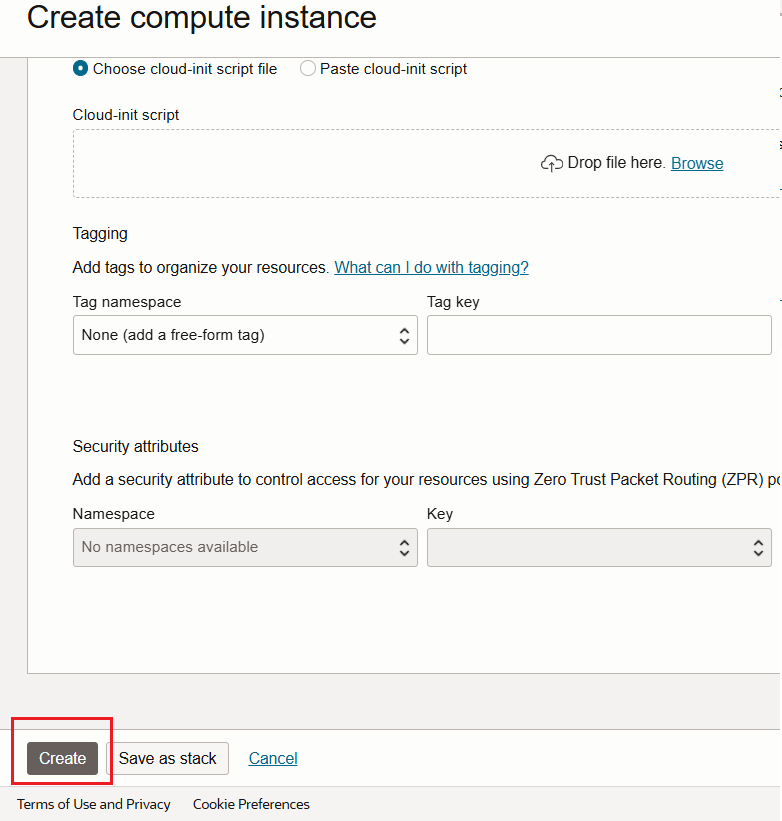
Create an Oracle Cloud Infrastructure Compute instance (VM) containing the Release 12.2.14 database and application tiers from one of the provided images
Database Version – Oracle Database 19c (19.24 RU)
Oracle E-Business Suite Version – 12.2.14
Operating System – Oracle Linux 8 8.10 64-bit
Choose the Image from Market place
Select Image – Oracle E-Business Suite 12.2.14 Demo Install Image
Configure Web Entry Point $ /u01/install/scripts/configwebentry.sh Enter the Web Entry Protocol (Eg: https/http): http Enter the Web Entry Host Name(Eg: public): myapps Enter the Web Entry Domain Name:(Eg: example.com): example.com Enter the Web Entry Port:(Eg: 443/80): 8000 Enter the ORACLE_SID:(Eg: EBSDB): EBSDB Running AutoConfig to complete the configuration
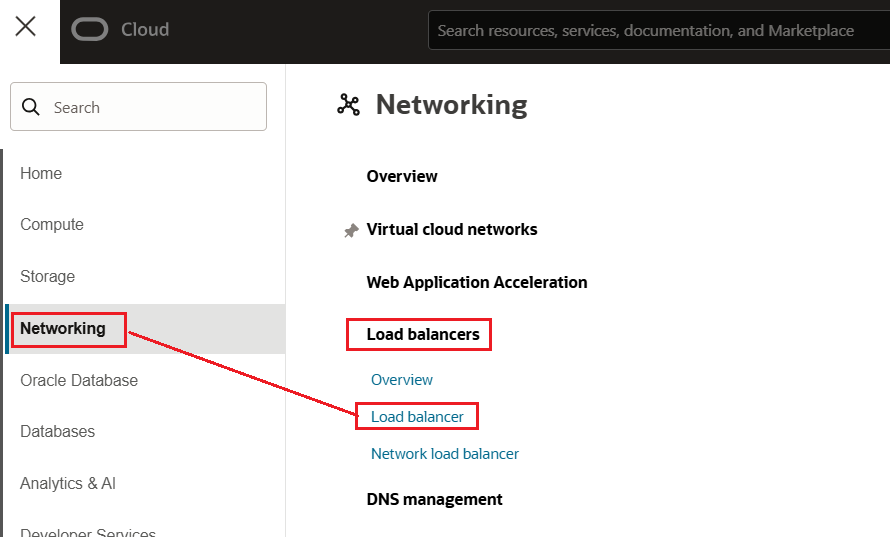
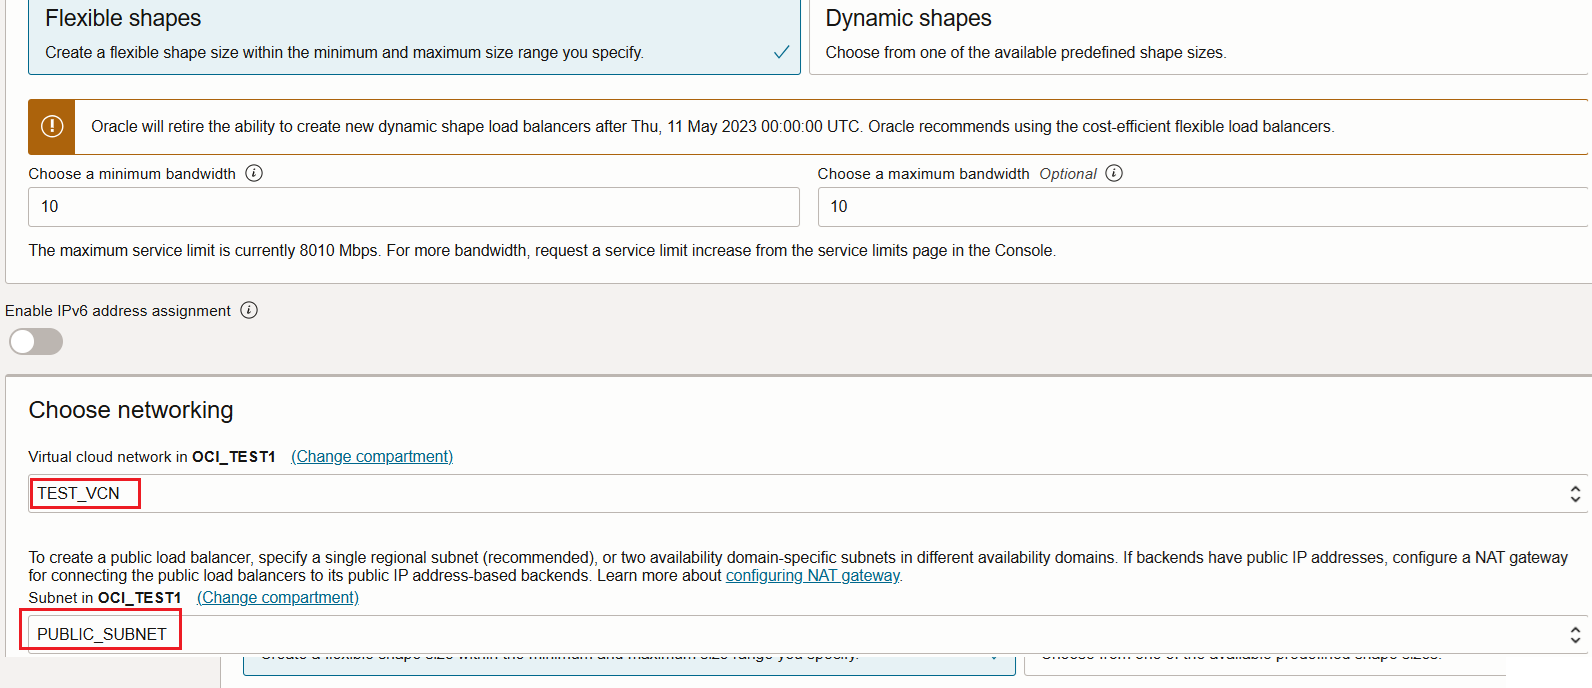
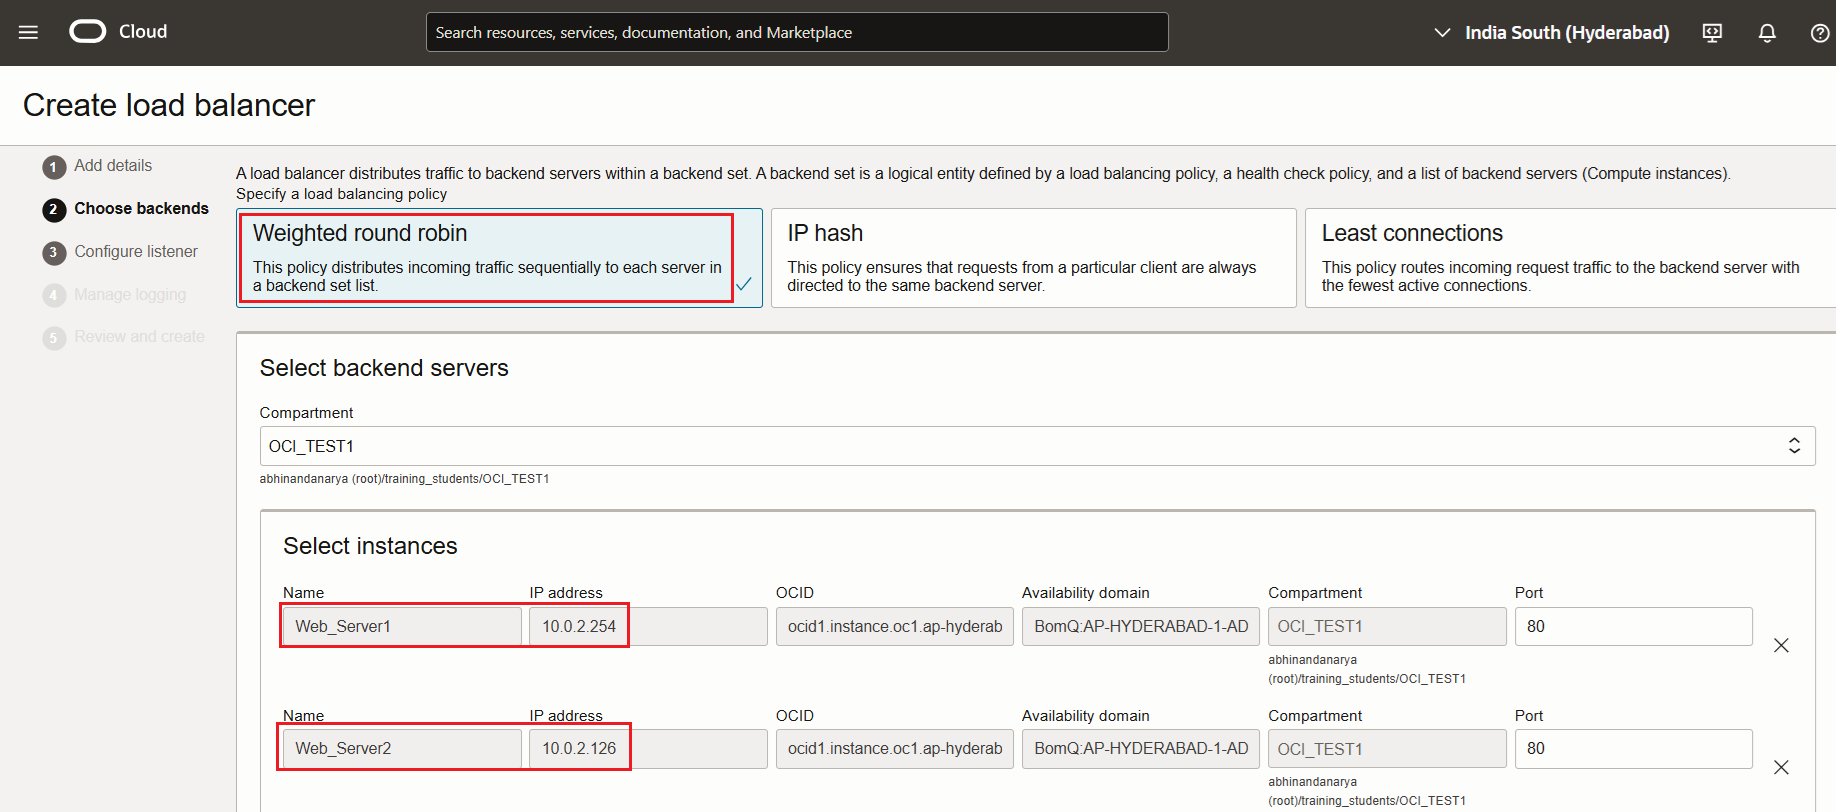
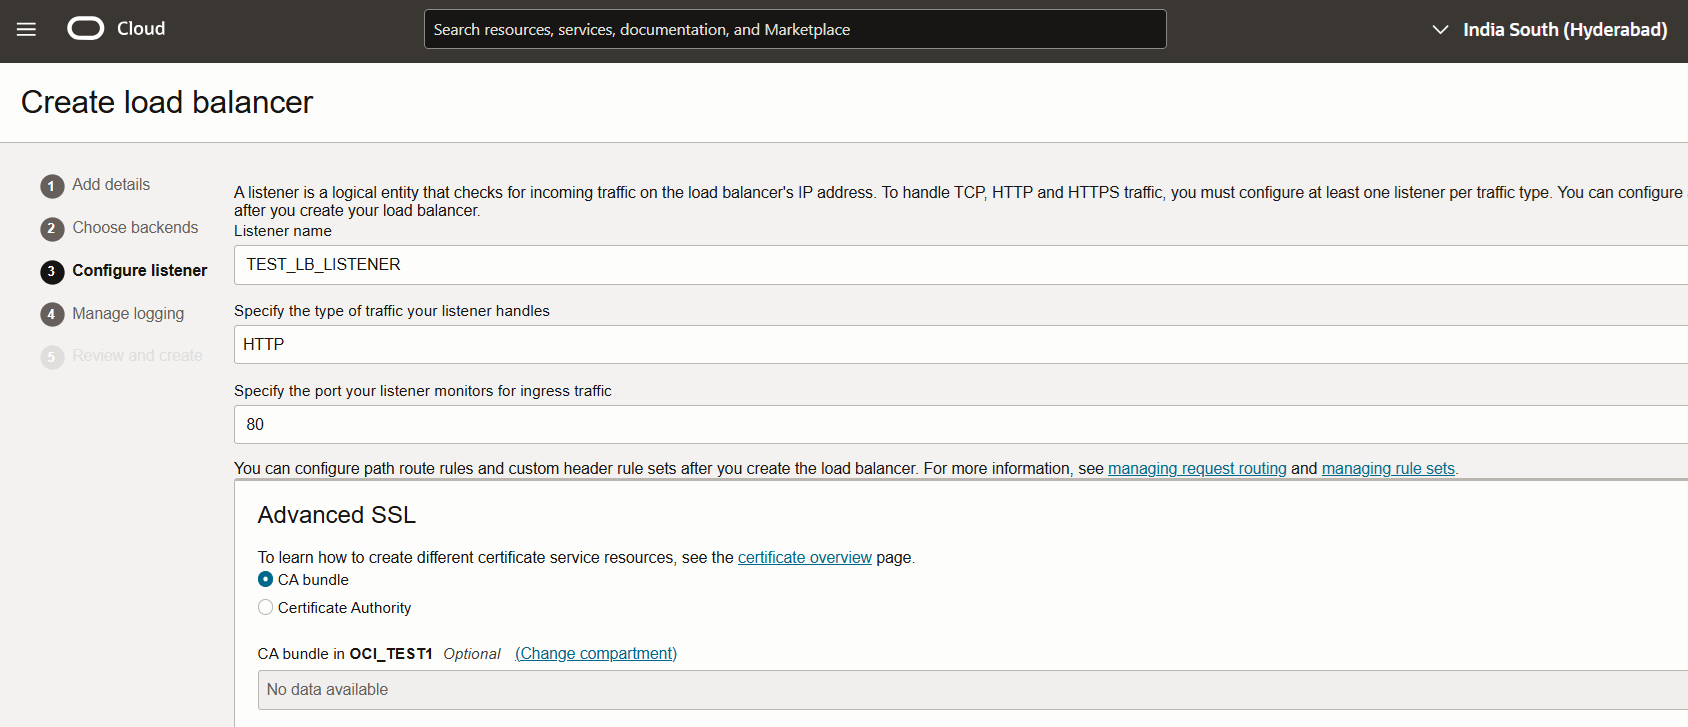
The primary function of a load balancer in OCI is to manage incoming traffic to web applications. It acts like a gatekeeper, directing client requests across multiple servers. This setup ensures that no single server bears too much load, which in turn keeps the application running smoothly and reliably.
High Availability and Scalability
High availability is one of the key reasons for using a load balancer. It ensures that even if one server goes down, the application remains accessible by rerouting traffic to other functioning servers. Scalability comes into play when there’s a surge in user traffic. The load balancer efficiently distributes this increased traffic among servers, preventing any single server from becoming a bottleneck.
Start the PuTTYgen utility, by double-clicking on its .exe file
For Type of key to generate, select RSA. In the Number of bits in a generated key field, specify either 2048 or 4096 (increasing the bits makes it harder to crack the key by brute-force methods). Click the Generate button.
Move your mouse pointer around in the blank area of the Key section, below the progress bar (to generate some randomness) until the progress bar is full.
A private/ public key pair has now been generated, Click the Save public and private keys. If you lose your keys and have disabled username/password logins, you will no longer be able to log in server.