
The primary function of a load balancer in OCI is to manage incoming traffic to web applications. It acts like a gatekeeper, directing client requests across multiple servers. This setup ensures that no single server bears too much load, which in turn keeps the application running smoothly and reliably.
High Availability and Scalability
High availability is one of the key reasons for using a load balancer. It ensures that even if one server goes down, the application remains accessible by rerouting traffic to other functioning servers. Scalability comes into play when there’s a surge in user traffic. The load balancer efficiently distributes this increased traffic among servers, preventing any single server from becoming a bottleneck.
For creating Load Balancer, you need VCN and Subnets, please visit this page for the same – OCI – Creating Virtual Cloud Network(VCN) with Public and Private Subnets
Please create Two Private Compute Instances, for Creating Compute Instance, please visit this page OCI – Create OCI Compute Instance
Create 2 webservers in Private Subnet
VCN – 10.0.0.0/16
Public Subnet – 10.0.1.0/24
Private Subnet – 10.0.2.0/24
Web_Server1 – 10.0.2.254
Web_Server2 – 10.0.2.126

Configure Web Servers:
Install Apache HTTP Server in both web servers.
sudo yum install httpd -y
sudo apachectl start
sudo apachectl status
sudo systemctl enable httpd
sudo systemctl status httpd
sudo apachectl configtest
sudo firewall-cmd --permanent --zone=public --add-service=http
sudo firewall-cmd --reload
Create an index file in web-server1:
sudo bash -c 'echo This is my Web-Server-1 running on Oracle Cloud Infrastructure >> /var/www/html/index.html'
cat /var/www/html/index.html

Create an index file in web-server2:
sudo bash -c 'echo This is my Web-Server-2 running on Oracle Cloud Infrastructure >> /var/www/html/index.html'
cat /var/www/html/index.html

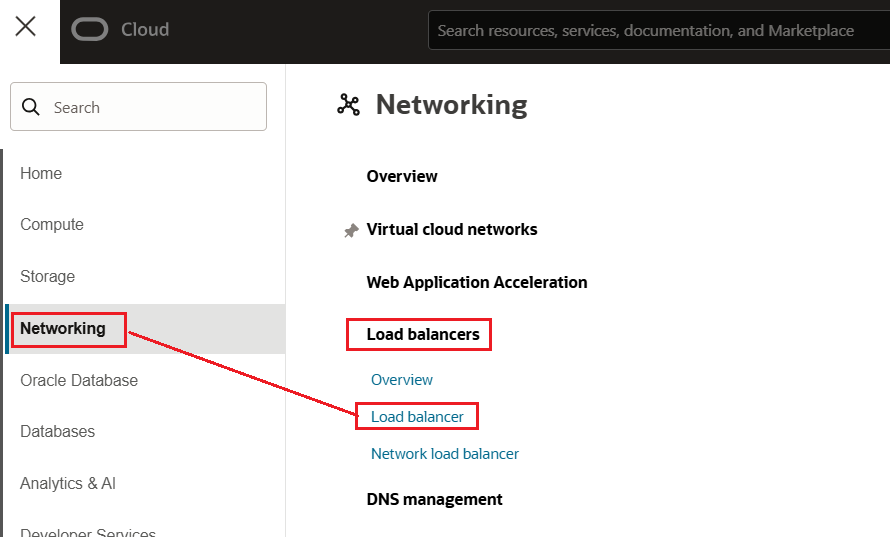
Create and Test the Load Balancer
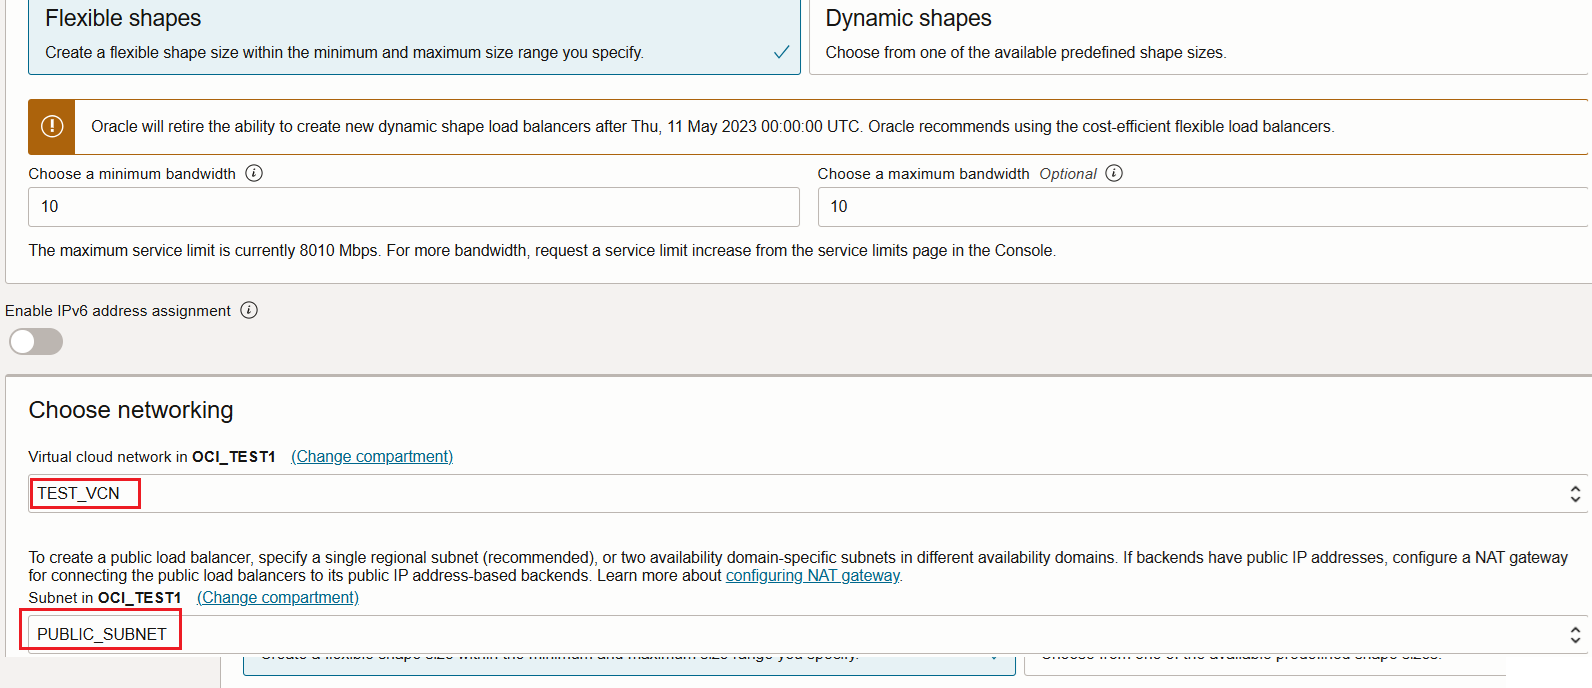
Click on Load Balancer – Provide Name, Choose Public LB and Flexible Shapes

Choose VCN and Public Subnet
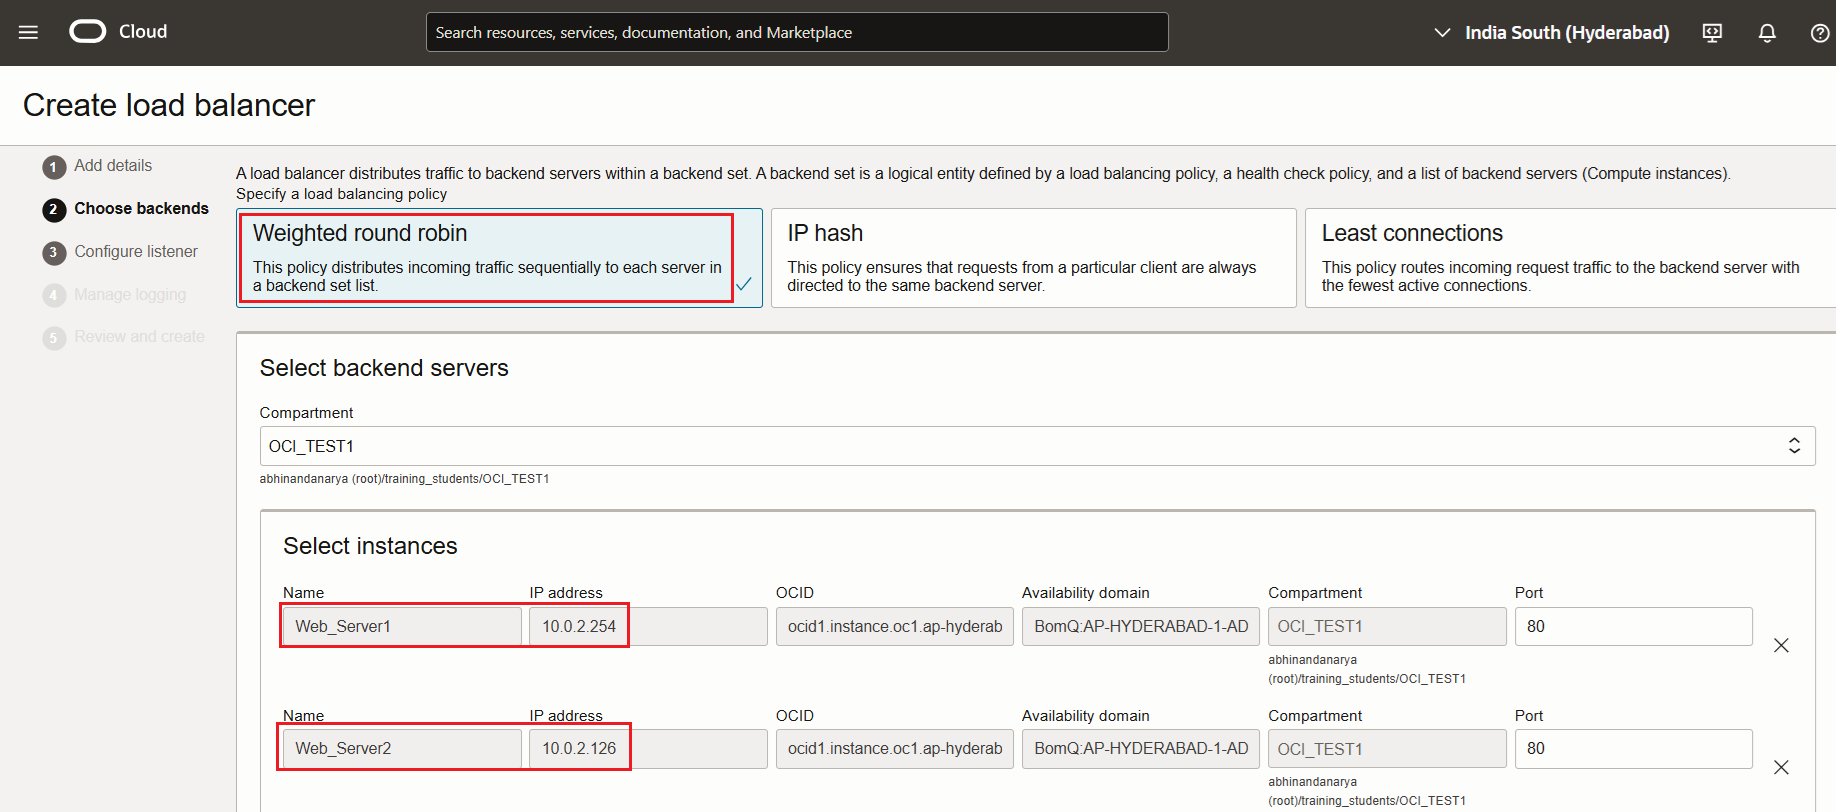
Choose Round robin Policy and choose backend Servers
Specify health check policy for Backend Servers (HTTP and Port 80) and Provide name for Backend Set

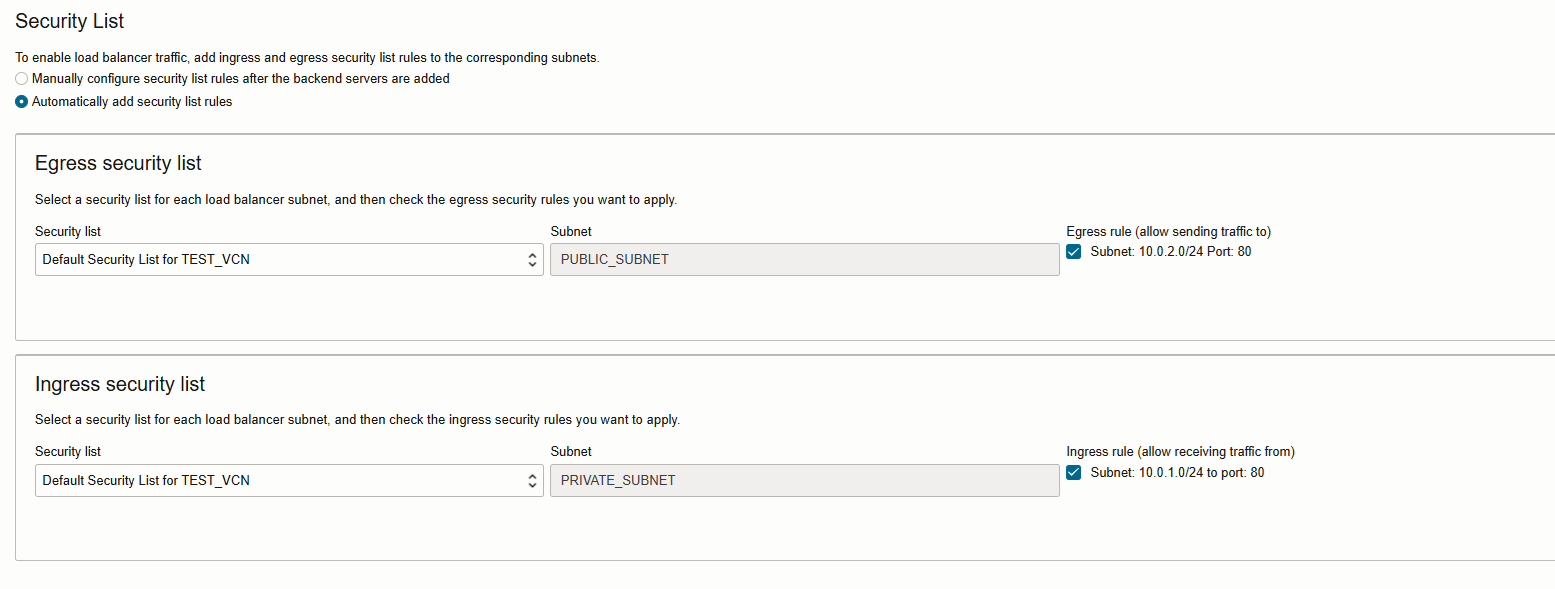
Verify Security rules
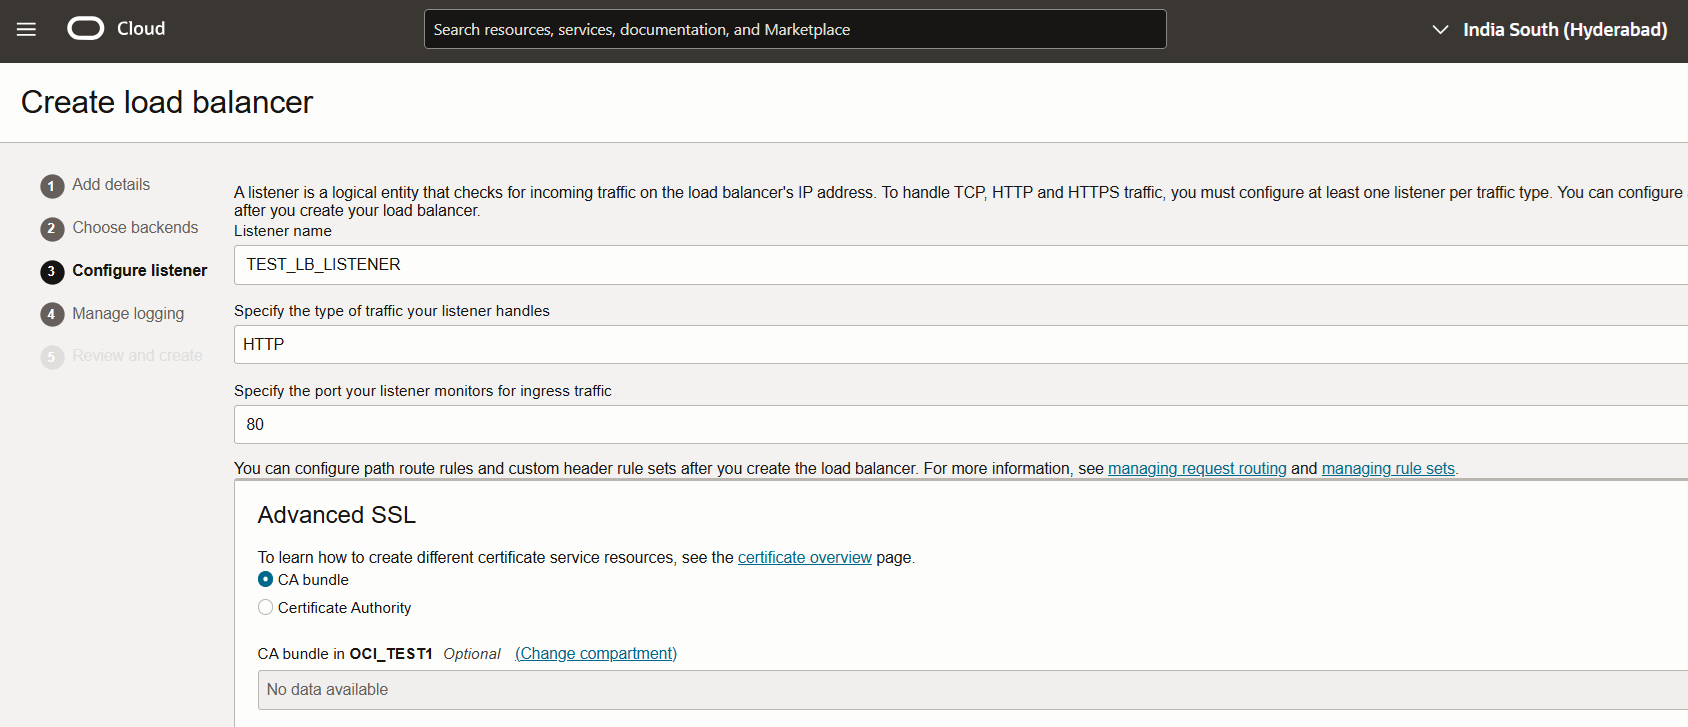
Provide Name for Listener

Review and create Load Balancer.
Review Load Balancer Health Check.
Access the Application using LB Public IP – http://129.159.23.125:443

Review Backend sets and Listener Details

Now let us Test and Validate the Application using Load Balancer Public IP – http://129.159.23.125:443
LB is routing the requests to Web-Server 1 and Web-Server 2

Thank you !
Happy Learning !!
